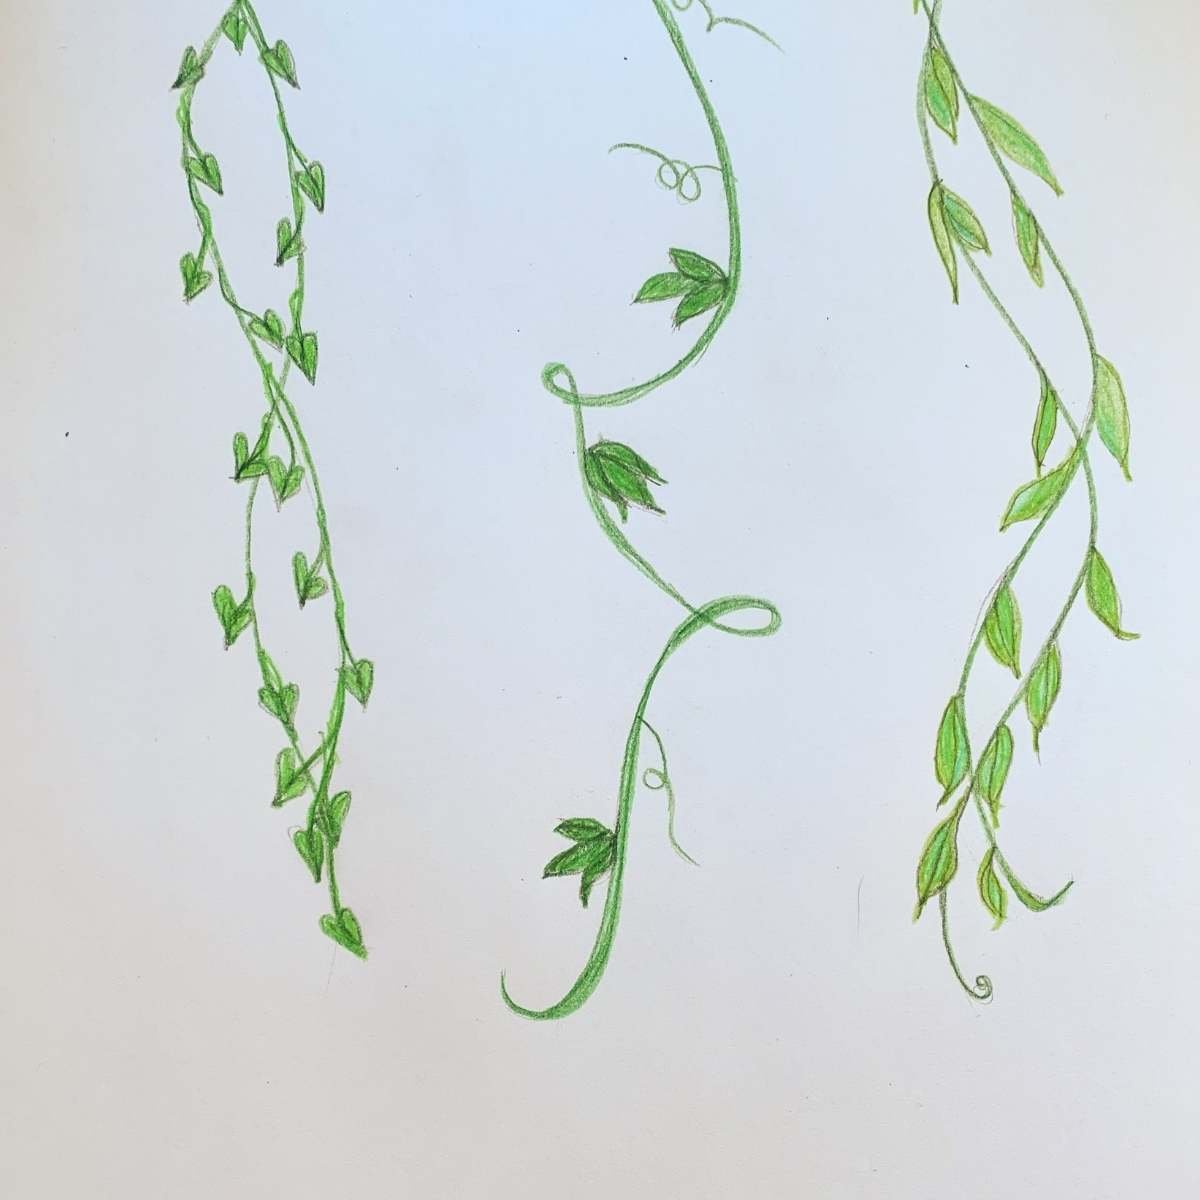
Drawing a vine can add a touch of nature’s elegance to your artwork. Begin by sketching a curved line for the main vine. Add smaller lines branching off for the leaves. Use varying thickness and shading for depth. Practice “how to draw a vine” with these simple steps to bring life to your illustrations. Let’s dive in and discover the beauty of vines through art.
How to Draw a Vine: A Fun and Creative Guide
Introduction
Drawing vines can be a fun and relaxing activity that allows you to unleash your creativity. Whether you want to add a touch of nature to your artwork or create a whimsical design, learning how to draw vines can open up a world of possibilities. In this comprehensive guide, we will explore step-by-step instructions on how to draw vines in various styles and shapes. So, grab your pencil and paper, and let’s get started!
Materials You Will Need
Before we dive into drawing vines, let’s gather the materials you’ll need to bring your creations to life. Make sure you have the following:
1. Pencil:
A pencil is an essential tool for sketching out the initial outline of your vine drawing. You can use a regular graphite pencil or a mechanical pencil for more precise lines.
2. Paper:
Choose a clean sheet of paper to draw your vine. You can use any type of paper, but a blank sheet without lines will give you more freedom to create.
3. Eraser:
Having an eraser handy will help you correct any mistakes or make adjustments to your vine drawing as you go along.
4. Colored Pencils (Optional):
If you want to add color to your vine drawing, colored pencils can bring your artwork to life. Choose green shades for a realistic look or experiment with different colors for a more artistic touch.
Step-by-Step Guide on How to Draw a Vine
Step 1: Draw the Main Stem
Start by drawing the main stem of the vine. Use your pencil to sketch a curved line or a wavy line to create the base of the vine. Vines can twist and turn, so feel free to add some bends to make it more interesting.
Step 2: Add Leaves
Next, add leaves along the main stem of the vine. Draw small oval shapes along the stem, leaving some space between each leaf. Vary the size of the leaves to give your vine a natural look.
Step 3: Draw Tendrils
Tendrils are thin, curling extensions that vines use to cling onto surfaces for support. Draw small, swirling lines extending from the main stem and around the leaves to create tendrils. Tendrils can add a dynamic element to your vine drawing.
Step 4: Add Details
To make your vine drawing more realistic, you can add details such as tiny veins on the leaves, thorns or flowers. Take your time to add these details carefully to enhance the overall look of your vine.
Step 5: Shade and Color (Optional)
If you’re using colored pencils, you can now add shades of green to the leaves and stem to give your vine depth and dimension. Experiment with different shades and blending techniques to create a vibrant and lifelike vine drawing.
Tips for Drawing Vines
1. Study Real Vines:
Take inspiration from real vines in nature. Look at pictures of vines or observe vines in your surroundings to get an idea of their shapes and structures.
2. Practice Patience:
Drawing vines can require patience and attention to detail. Take your time with each step and don’t rush the process. Enjoy the journey of creating your vine drawing.
3. Experiment with Styles:
Vines come in various shapes and forms. Don’t be afraid to experiment with different styles and designs when drawing vines. Let your imagination run wild!
4. Have Fun:
Drawing should be a fun and enjoyable experience. Don’t worry about making mistakes – embrace them as part of the learning process. Let your creativity flow as you draw your vine.
Drawing vines can be a creative and rewarding activity that allows you to express yourself through art. By following the steps outlined in this guide and incorporating your own unique style, you can create beautiful vine drawings that bring a touch of nature to your artwork. So, grab your pencil and start drawing your own vines today!
How to draw Vines
Frequently Asked Questions
How can I start drawing a vine?
To begin drawing a vine, start by sketching the main stem or trunk of the vine using a curved line. Then, add smaller curving lines branching out from the main stem to represent the vines’ tendrils. You can add leaves or flowers along the vine to give it a more realistic look.
What are some tips for drawing realistic vines?
When drawing vines, pay attention to the natural flow and curvature of real vines. Try to vary the thickness of the vine to create depth and dimension. Additionally, adding small details like thorns or texture can enhance the realism of your drawing.
How can I add shading to my vine drawing?
To add shading to your vine drawing, identify a light source and imagine where the shadows would fall on the vine. Use hatching or cross-hatching techniques to create shadows and depth. Darken areas that would be in shadow and leave lighter areas where light would hit the vine.
Final Thoughts
Creating a realistic vine involves attention to detail. Begin with a simple line as the vine’s base. Add curves and twists for a natural look. In shading, use varying pressure for dimension. Remember, practice enhances your skill in drawing a vine effortlessly.


